Make promotion part of your blogging process (and here’s how to do it)
Make promotion part of your blogging process
There’s a lot more to promoting a blog post than publishing it to your social media accounts.
When I first started blogging, I’d share to a few social networks and that was as far as it went.
Then I found other promotional tactics and used those every so often, but I found it difficult to be consistent. Most of the other tactics would get missed out after a while.
Aside from my poor memory, the reason why this happened was that I didn’t have a documented process for promoting each post.
Ever since I created my first blog promo checklist, I’ve driven more traffic to my content and saved loads of time that would have previously been spent trying to figure out where to promote each post.
It’s time to create your own blog post promo checklist
The exact tactics you include in yours may vary; after all, every niche is different.
All you need is a spreadsheet to get started.
You’ll need some basic information first for each post (it speeds up the process):
- Headline
- Post description
- Post excerpt
- Shortened URL
- Twitter handles and/or emails of anyone mentioned in your post
Then you can add some basic promotion tactics:
- Email to your subscribers
- Share to your social networks
- Share to popular social bookmarking sites
- Share to niche social bookmarking sites
- Let people whom you’ve mentioned know
Now that you’ve got all of the basics covered, you need to flesh out the checklist with other tactics you can use and sites that you can leverage to promote your content.
These will be dependent on how much time you want to spend promoting your content (the more, the better) and on your niche.
The web is full of specific posts on this topic, but these two posts are a good starting point:
- How To Promote Your Blog: The Complete Beginner’s Guide
- 32 Smart Ways To Drive More Traffic To Your Blog
Once your checklist is complete, you can keep an eye on your analytics to see how well it’s paying off.
You may want to swap out certain tactics, but remember that if a tactic doesn’t work the first time, it doesn’t mean it won’t work for you.
It means that you might need to try a different approach.
How to keep your audience coming back for more
We’ve covered some effective steps to accelerate the growth of your blog’s audience, now it’s time to ensure they keep coming back.
Below you’ll find out how to improve your blog’s user experience and make it easier to notify your readers about new posts.
1. Tidy up your blog’s user experience
Our goal should always be to simplify the experience on our blog’s as much as possible.
Every element on our blog must have a purpose, if it’s of no help to anyone – it probably shouldn’t be there.
Here are a few things to look at when you get started:
- Make it clear who your blog is for and how your blog will help them – Your about page is a great page for this. Just answer this phrase: My blog helps ___ to __________. You could use this to create a catchy headline for your homepage and descriptions for your social media accounts.
- Trim down navigation menu items – I like to keep my main navigation simple and focused. There are always other pages that need to be visible somewhere; I put those in my footer.
- Remove unnecessary clutter – Is there anything you can remove? Maybe from your sidebar or your footer? Maybe you’re displaying ads which aren’t performing or you’re displaying a badge which has no purpose. Consider removing anything that doesn’t have a purpose.
One more aspect of your blog to improve
Aside from all of the tweaks you can make to how your blog looks, there’s one more important consideration…
… Page loading times.
This is super important, not just for users but also for search engines (page loading times are part of Google’s Algorithm).
The most important thing to consider is your web host.
I use WPX Hosting for some of my sites, it’s more expensive than a lot of other web hosts (pricing starts at $24.99/month) but load times are good and support is insanely quick.
If you can justify the cost of upgrading to a fast web host, it’s well worth doing. I’d highly recommend checking out our article on WordPress managed hosting to find a provider that fits with your needs.
You can speed your website up using a content delivery network. Or CDN, for short.
The further someone is from the physical location of your server, the slower pages will load for them.
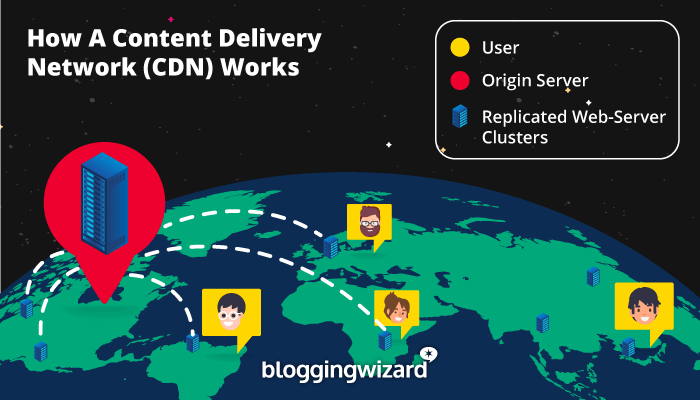
CDN’s deliver your content via a global network of servers, so someone trying to access your blog will be served files from a server that’s much closer to them, and so page load times increase.
StackPath is a great option and it works out around $8/month but there are free options like Cloudflare but don’t expect the same levels of performance.
Be sure to check out our post on CDN services for a full breakdown. If you want to learn more, check out our beginner’s guide to CDN’s.
2. Encourage your audience to subscribe to your email list
Building an email list is one of the best things you can do to keep people coming back to your blog.
Here are some tips to get you started:
- Use an email provider instead of a feed delivery service – Using an email provider like MailChimp means you can send out emails to your subscribers whenever you like and you get much more control over how emails look. You also get better analytics and can create sequences of emails that new subscribers will receive, otherwise known as auto responders. Be sure to check out my comparison of popular email marketing services.
- Offer something for free in exchange for email addresses – Your audience has a problem and your goal is to solve it so this is a great opportunity to put together a free resource for your readers. It could be a checklist, guide, template or even a tool.
- Make it easy for people to subscribe – Give your audience plenty of opportunities to subscribe. This means adding opt-in forms to strategic locations. Email capture tools like Thrive Leads are super effective.
Start utilizing landing pages for massive conversions
I want to talk about this tip in a bit more depth, because most bloggers don’t use landing pages.
A landing page is a page with one goal – to convert.
For our purposes, the conversion goal will be to get people to sign up to our email list.
Why are these pages so great?
… They have no navigation or other distractions, so they convert like crazy.
With targeted traffic and a well optimized page, it’s not unheard of to get over 50% conversions.
Here’s one of my landing pages which currently converts at around 50%:
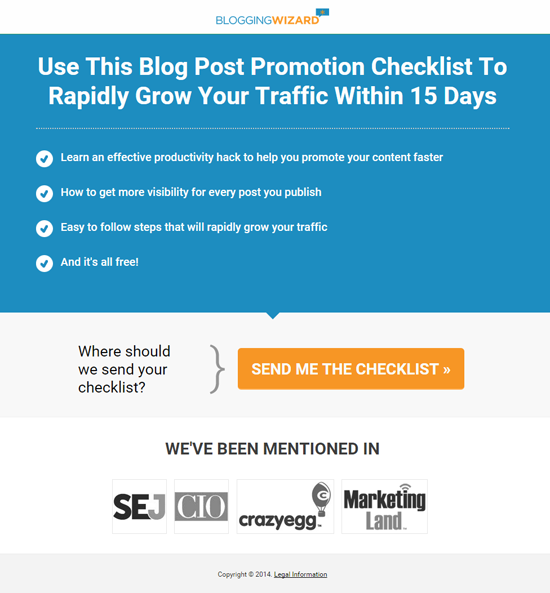
I used Leadpages (it costs $37/month) to create the above page but if you use WordPress and want something more cost effective, you could use Thrive Architect to create something similar.
There are free tools that can help you here, but most end up costing more than Thrive in the long run because of having to purchase add-ons etc.
How to leverage landing pages
Once you’ve created your own landing page, you can start driving traffic to it.
You could use social media updates for this, but the best tactic I’ve ever used for this has been guest blogging (we discussed this earlier).
Just include a link to your landing page in your author bio and you’re ready to go.
This will make it easy for anyone who reads your guest post to subscribe to your email list but it requires that you guest post on blogs with very engaged audiences – social shares and comments are a good benchmark to look at.
You could also experiment with paid traffic, because after all, guest blogging isn’t really free – you’re paying with time.
Whichever tactics you use to drive traffic to your landing pages, be sure to experiment and test new things.
Identify a tweak you can make which may improve conversions and run a split test. This is easy if you use Leadpages, if you use a WordPress plugin or tool which doesn’t have split testing you could use VWO instead.
Take your list building efforts a step further
Just by using a few of these tips, you’ll start to grow your email list faster than before.
For further reading on list building, check out my ultimate guide – it covers 36 tips to help you build your email list faster.
3. Ask your audience to join you on social networks
Considering the sub-heading above, the following may sound odd but bear with me:
It’s important to mention that your email list will be far more successful at bringing your readers back to your site than social media.
That’s a fact.
Why?
When someone clicks on your social profile, it’s far too easy for them to spot something else and not return.
I’m not saying social media is a waste of time, because it isn’t.
What I am saying is that you should prioritize list building via your blog over building your social networks via your blog (at least on the surface).
For example, my opt-in form is at the top of my sidebar, but links to my social profiles are in my footer:
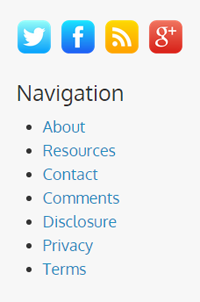
This ensures that while they aren’t distracting people away from my opt-in form, my social profiles are still accessible.
The key here is to introduce your social networks once people have signed up to your email list.
Here are a few ways you can do this:
- Add a follow button to your confirmation page – When someone confirms their subscription to your email list, they’ll be sent to a confirmation page. This is a great opportunity to add a Facebook Like box, Twitter follow button or something else.
- Invite your subscribers within a welcome email – When new subscribers join your list, they should get a welcome email telling them what to expect from you. With MailChimp you can send a “final welcome email” using a free account which does the job, for other email providers you may have to add this manually using their auto responder feature. This is as simple as asking them to join you on your favorite social network.
- Create a special email for your auto responder sequence – Most email providers have the option to create an auto responder sequence. Similar to the welcome email, you could add another email later which encourages subscribers to follow your social profiles. How you introduce this is up to you, you could use a “getting to know you” type email or just add it to the next email in your sequence.
4. Make RSS subscription easy (it’s not dead yet)
RSS is sometimes referred to Really Simple Syndication or Rich Site Summary.
It’s just a file which makes it easy to syndicate content.
Why is this important?
A lot of people use feed readers like Feedly and Netvibes to subscribe to their favorite blogs.
Some say that RSS is dead, but people still use it. It’s not as popular as it was but it’s still worth taking advantage of.
All you need to do here is make it easy to find your RSS feed URL.
WordPress creates this automatically for you, so yours would be:
http://domain.com/feed
Mine is:
https://bloggingwizard.com/feed/
Most feed readers will automatically find your RSS feed URL by default, but it’s still good to make this URL available.
I do this with a social media widget in my blog’s footer; it includes my social profile links too.
If you use WordPress, there are plenty of free plugins available


Comments
Post a Comment